Under the new exams which came out in 2011, this is the final practical exam for those following the watch pathway. Previously there was a 3 week exam in the final year where students had to make 5 parts for a watch, which included things such as a balance staff, keyless cover, setting lever etc.
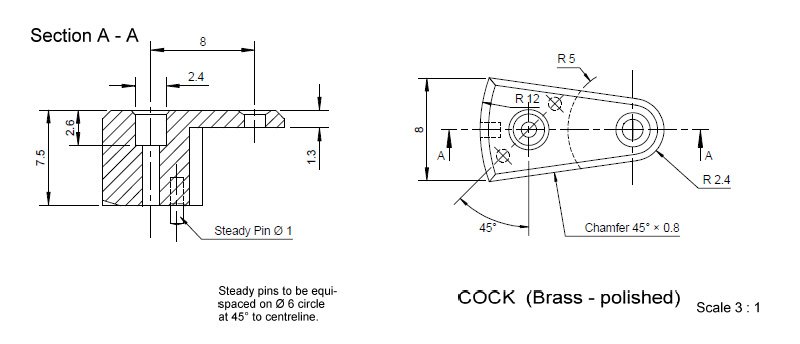
The cock was by far the most difficult and time consuming part of this exam. Firstly due to the relatively large amount of material to remove, and secondly because of the number of curves in it.
For those not completely familiar with making things by hand, anything that is flat or completely round is fairly straightforward to make, whereas a curve – or an arc of a circle – is a bit more tricky. There are three curves in total for this piece; the large outside curve (on the left hand side of the drawing), the small outside curve (on the right) and the inside curve (in the middle).
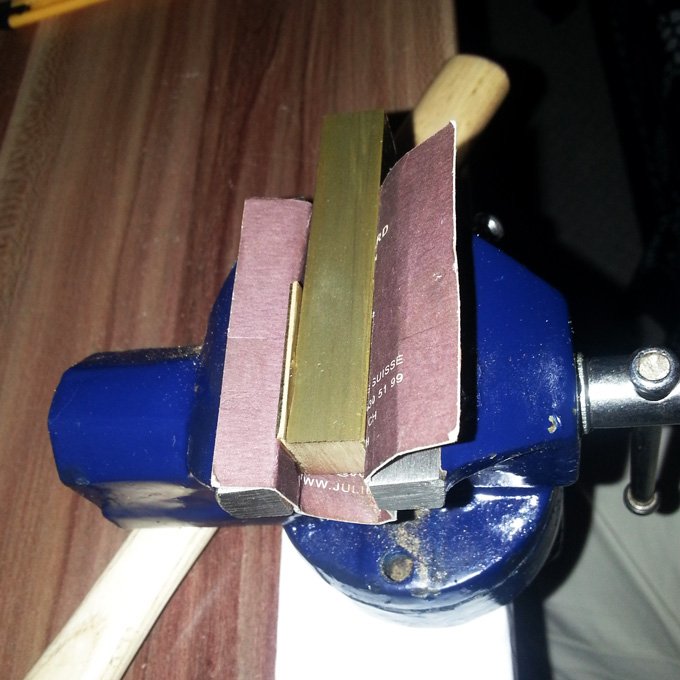
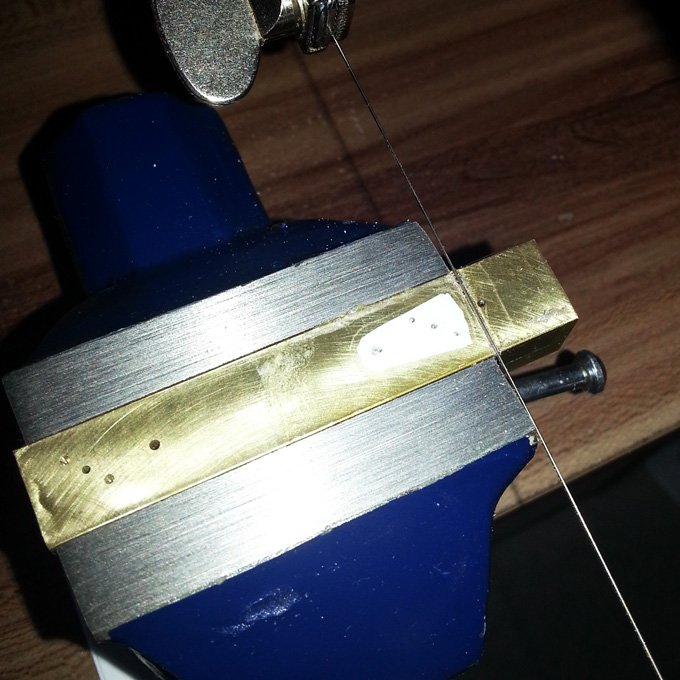
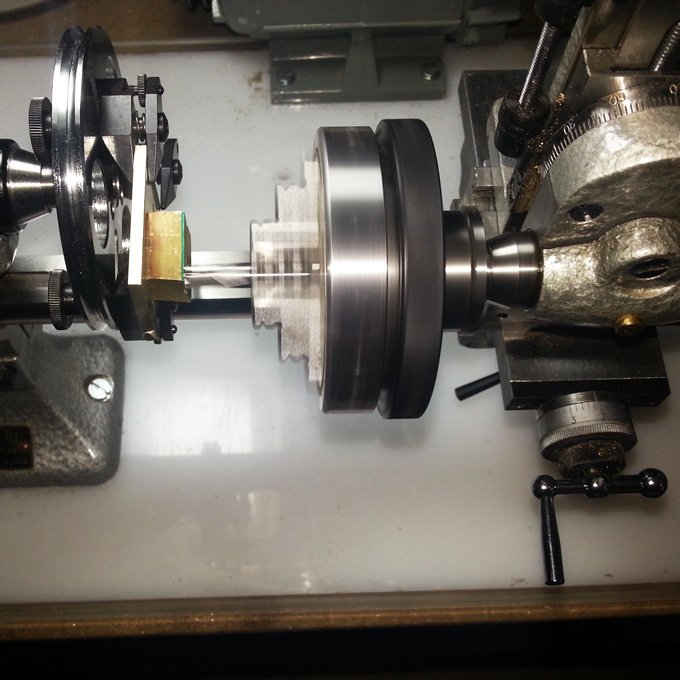
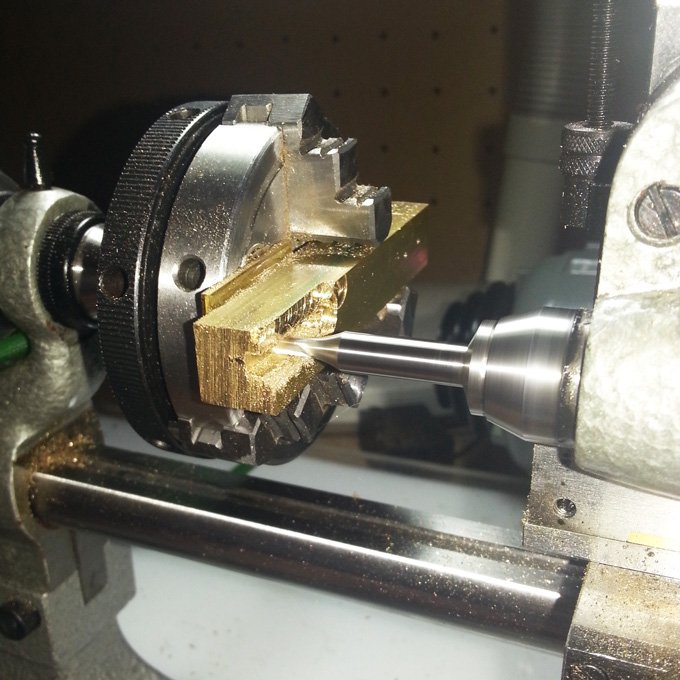
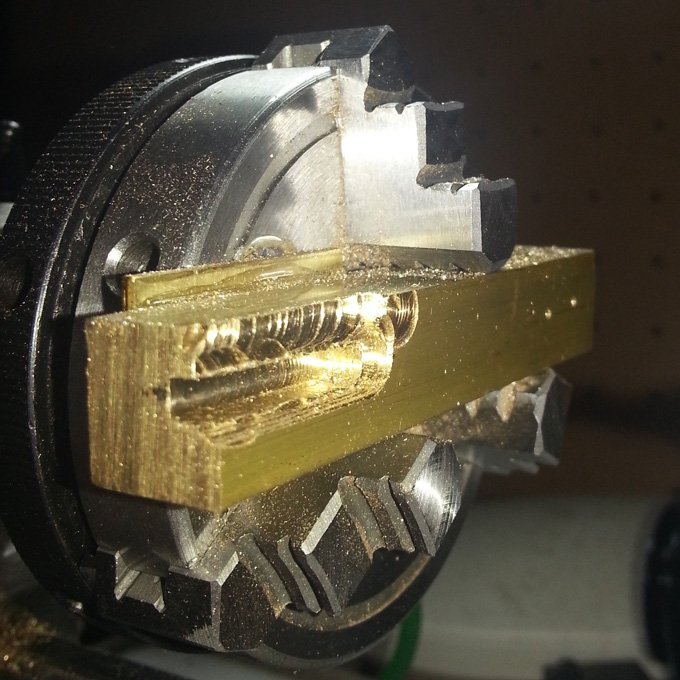
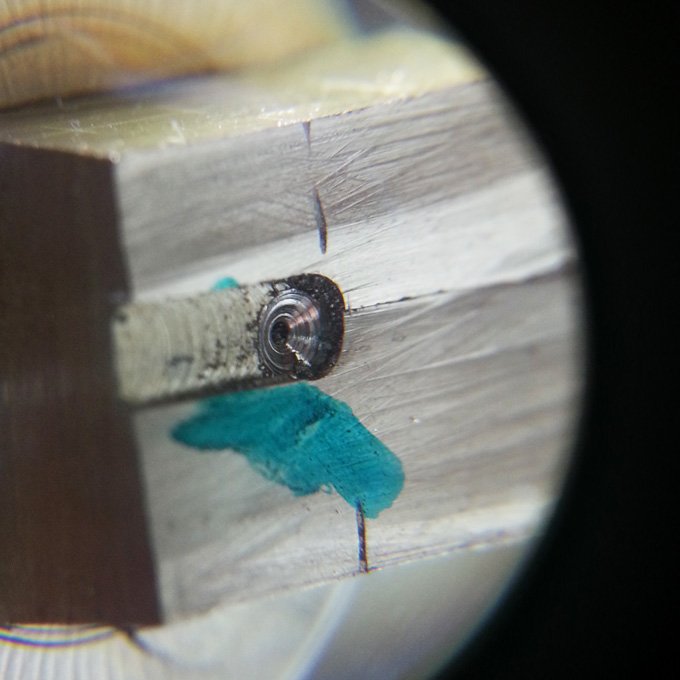
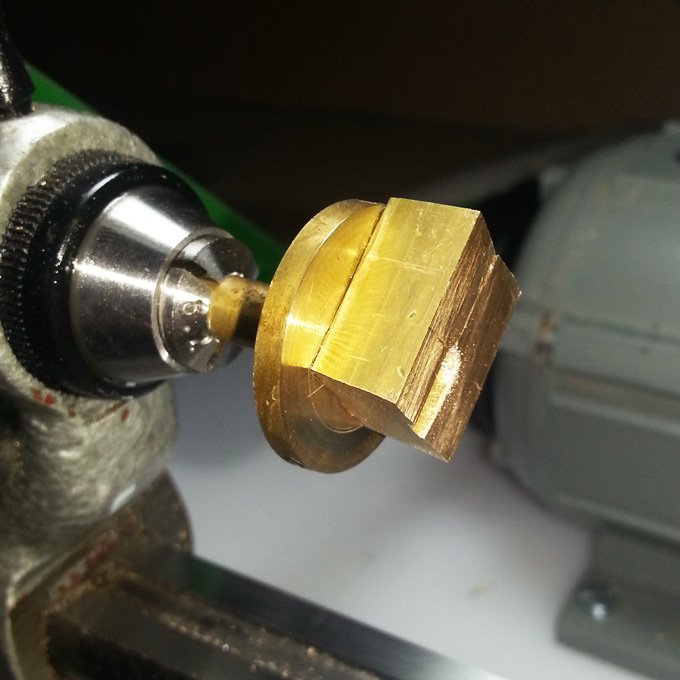
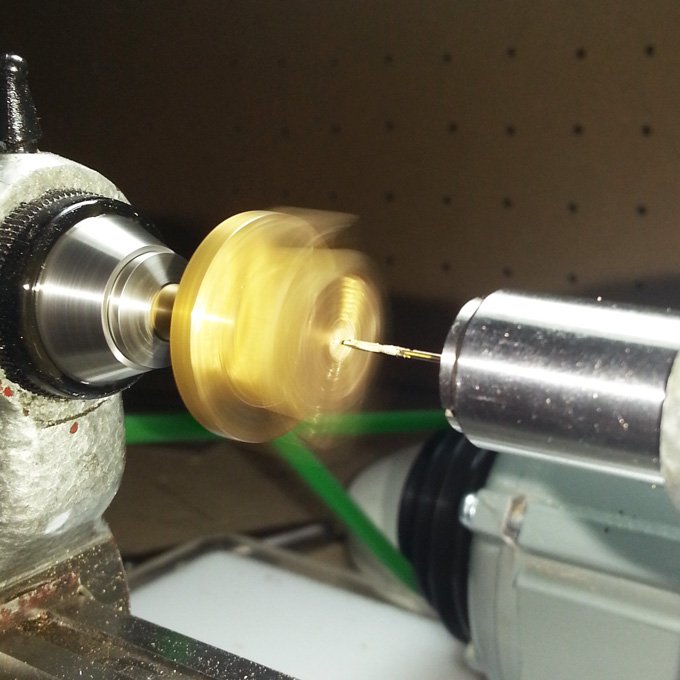
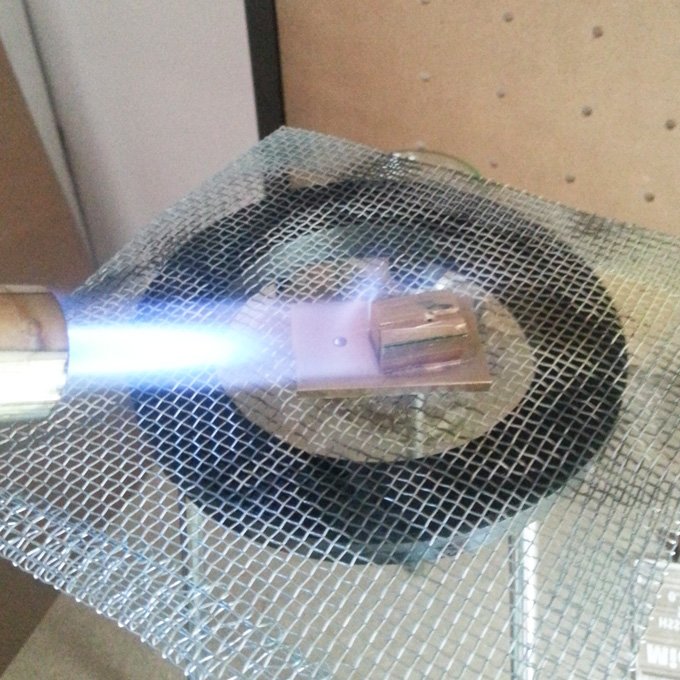
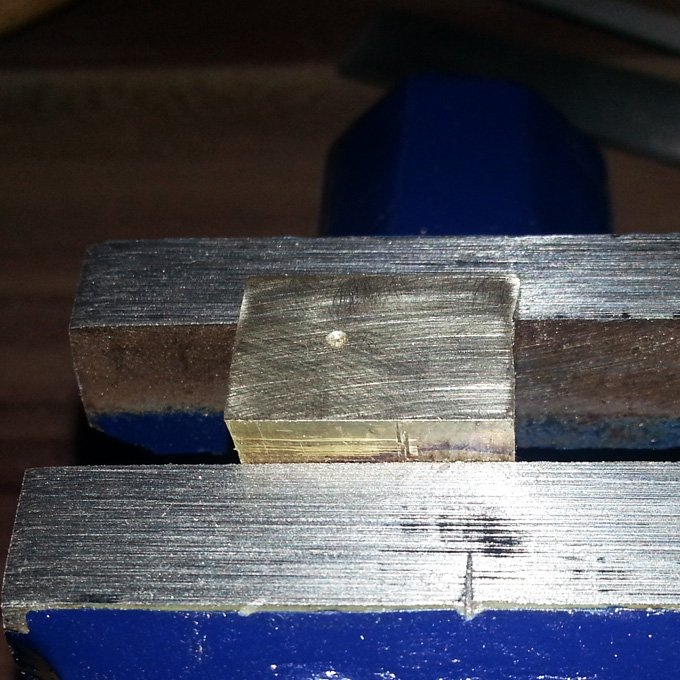
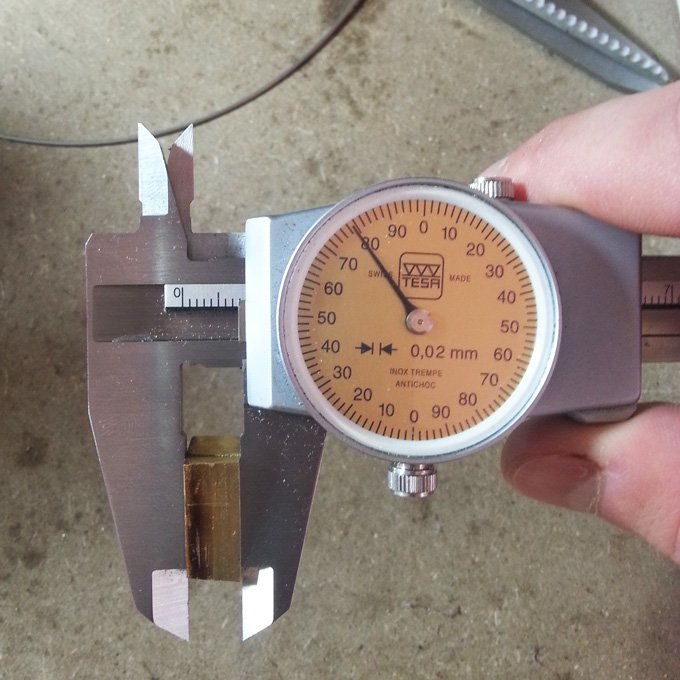
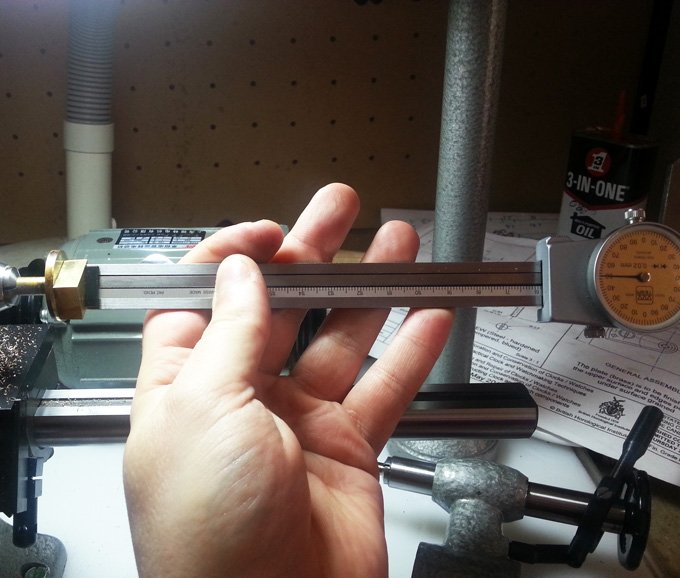
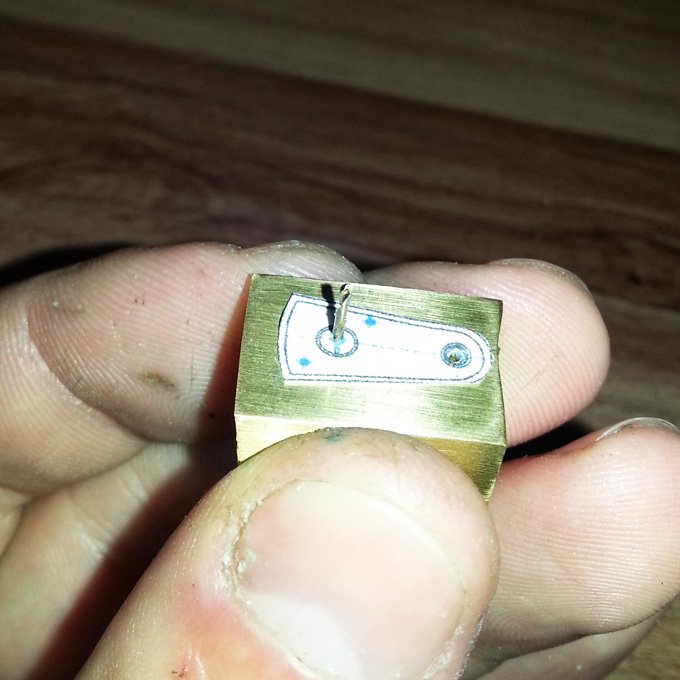
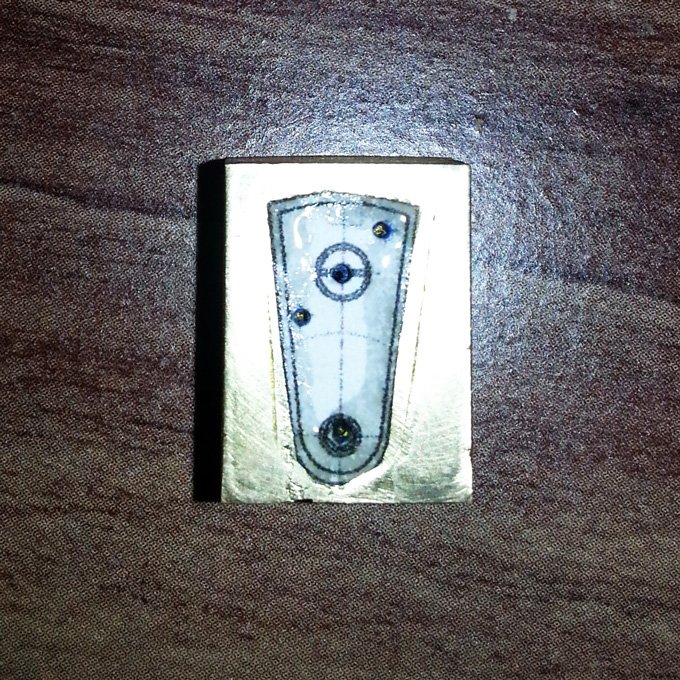
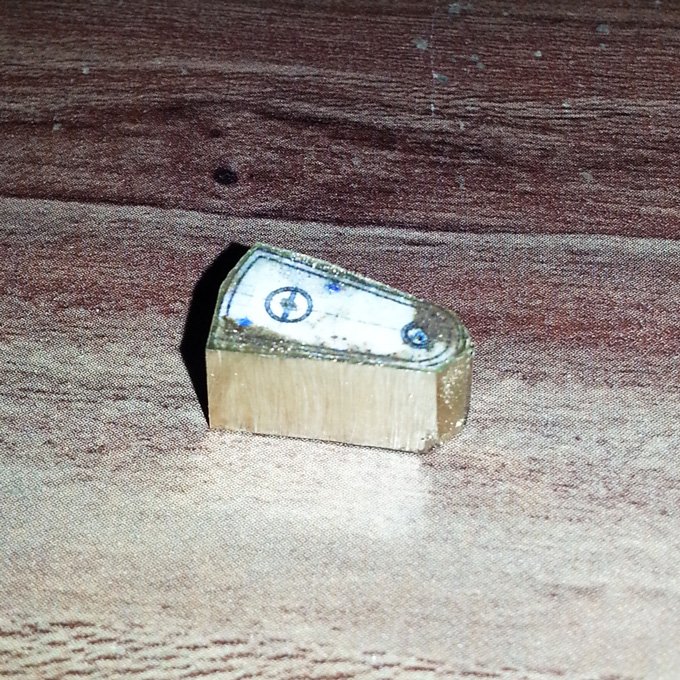
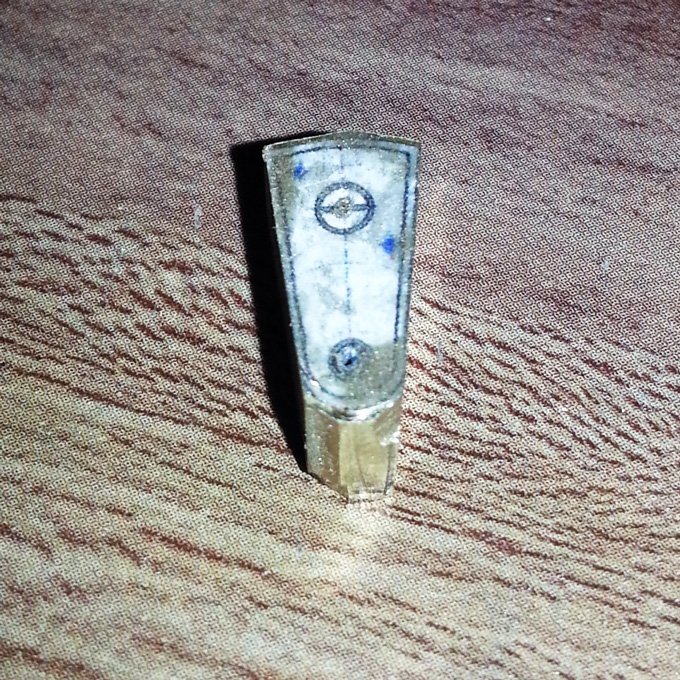
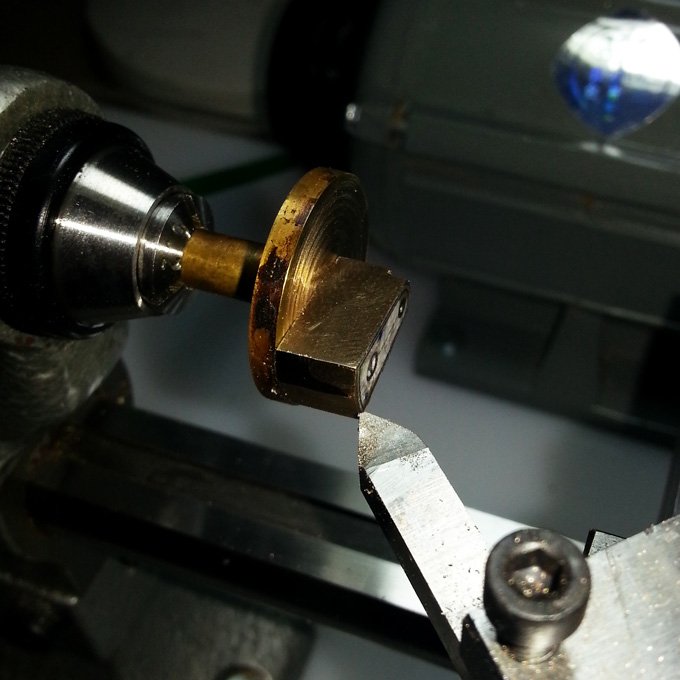
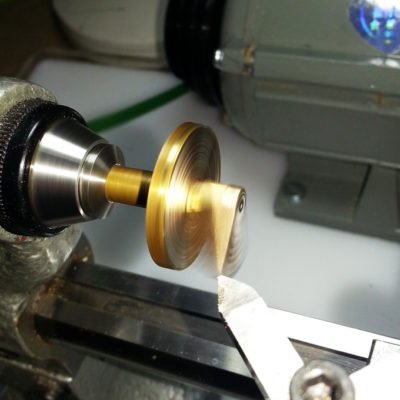
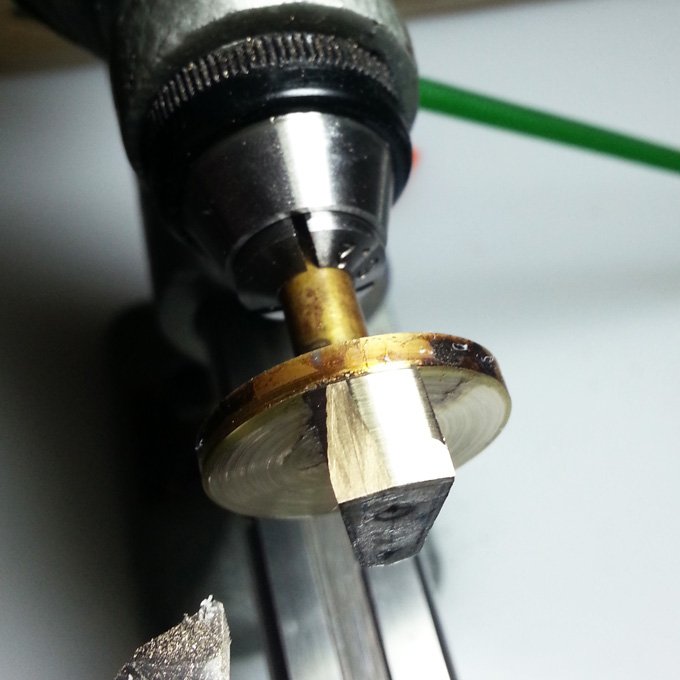
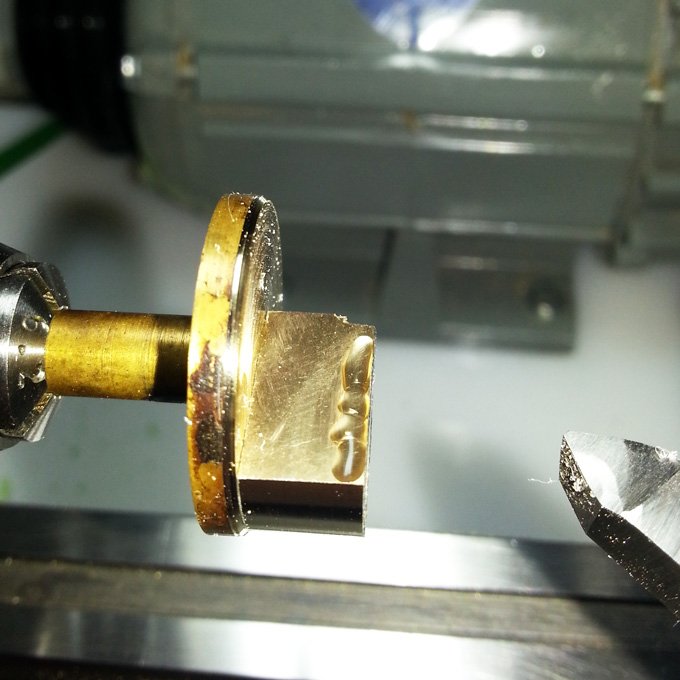
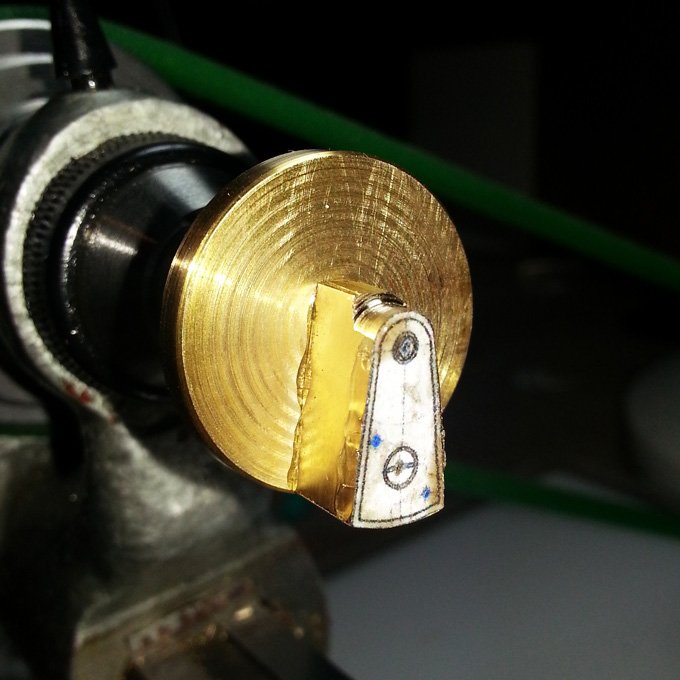
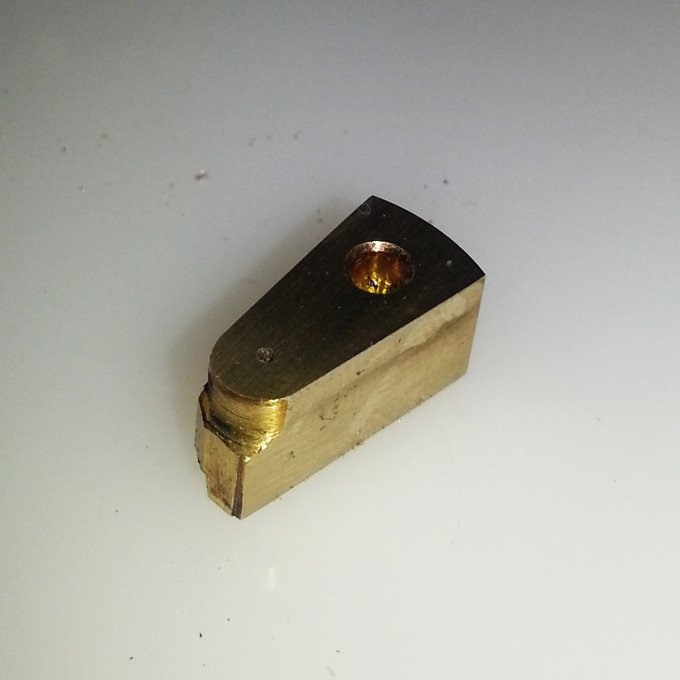
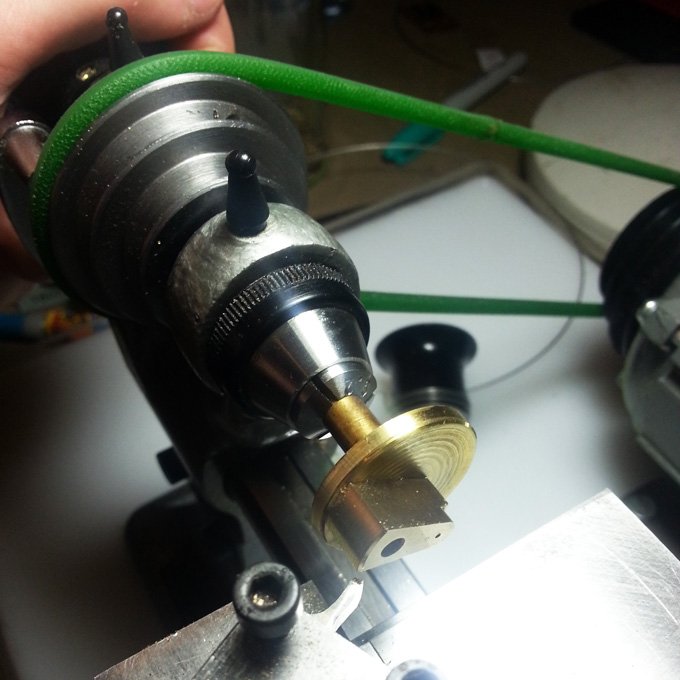
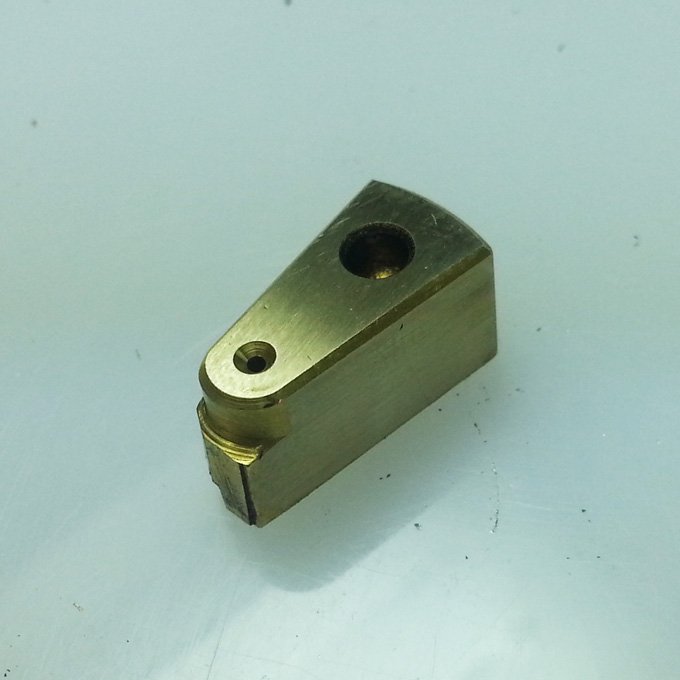
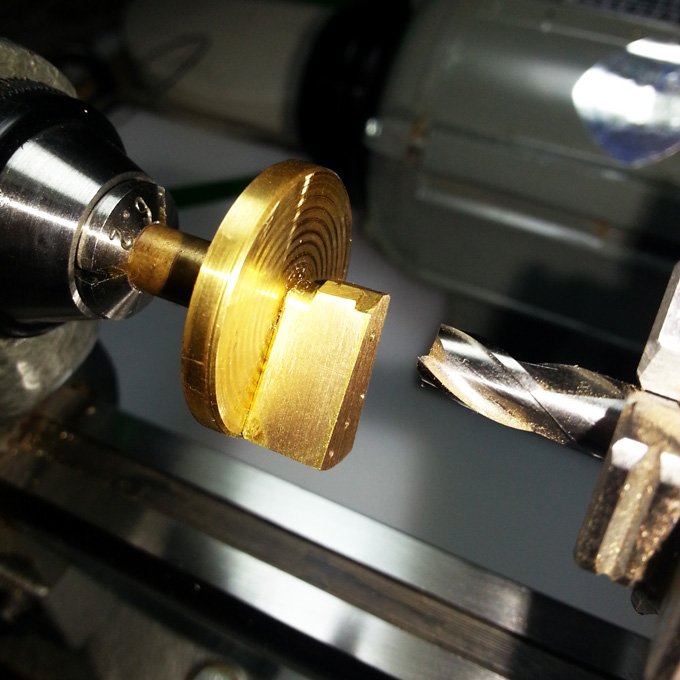
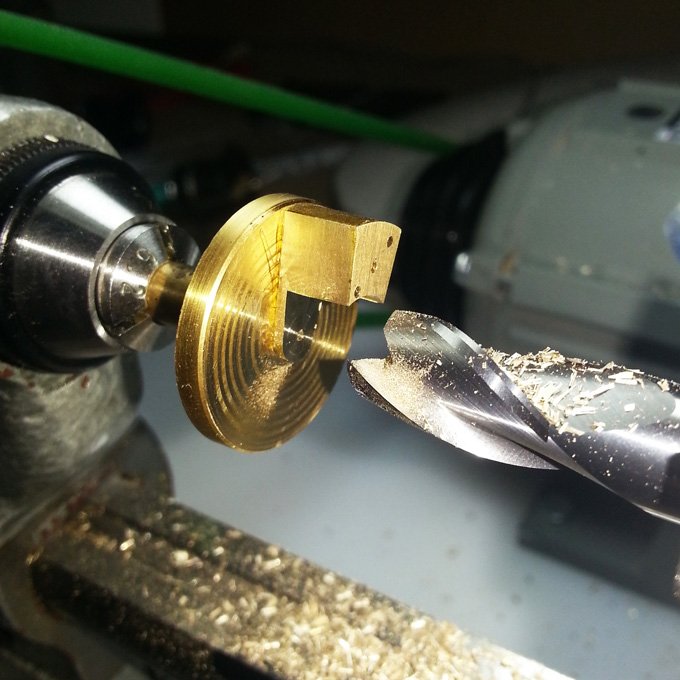
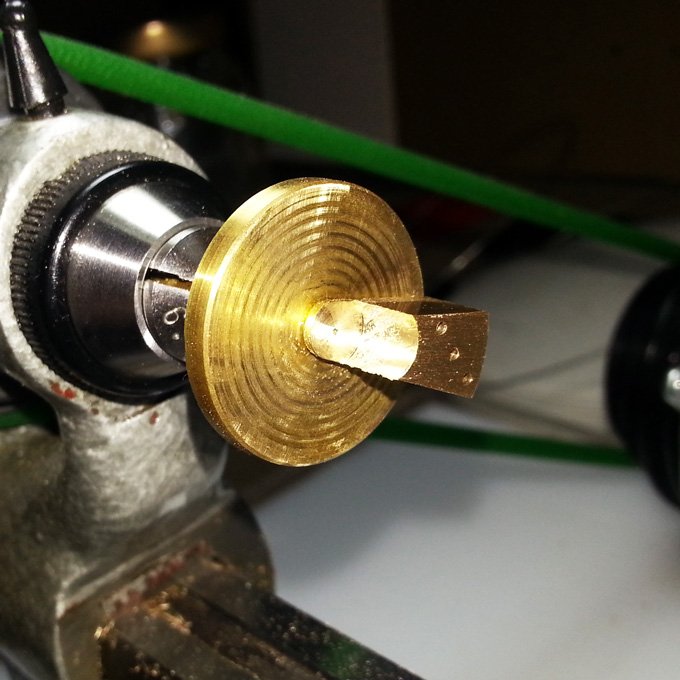
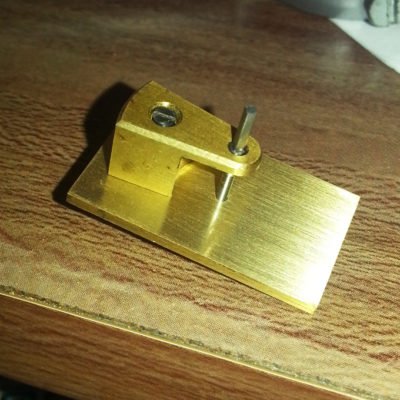
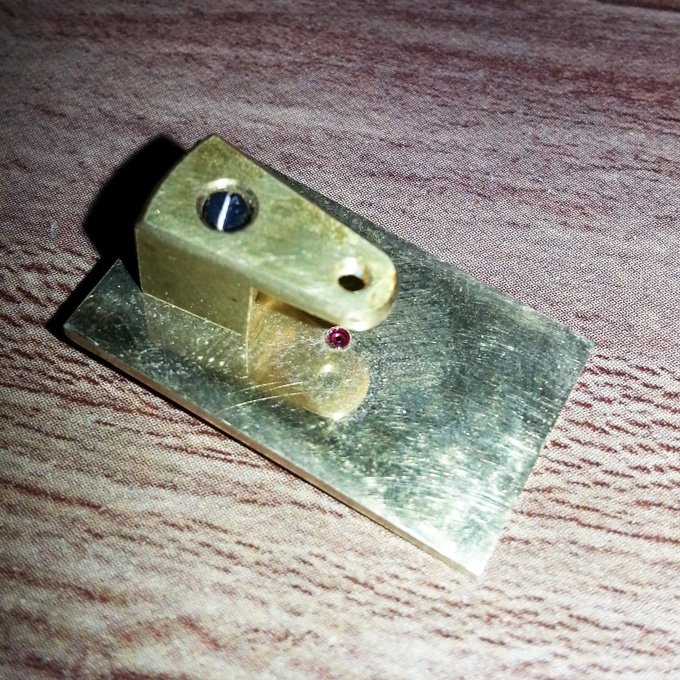
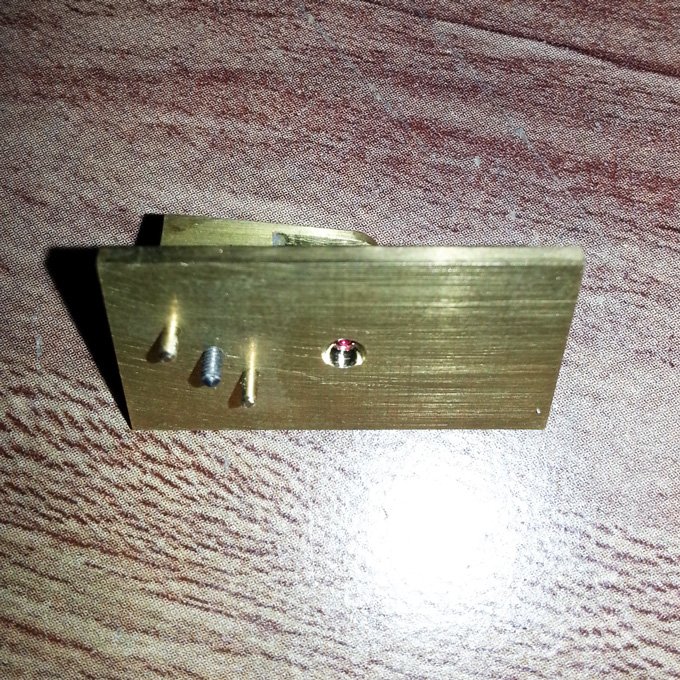
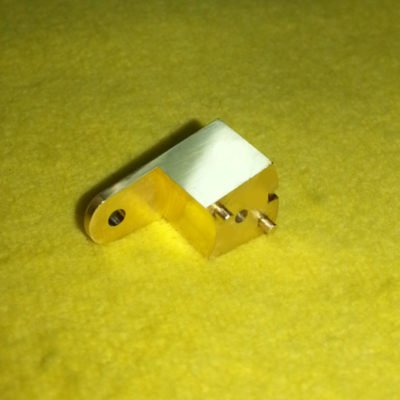
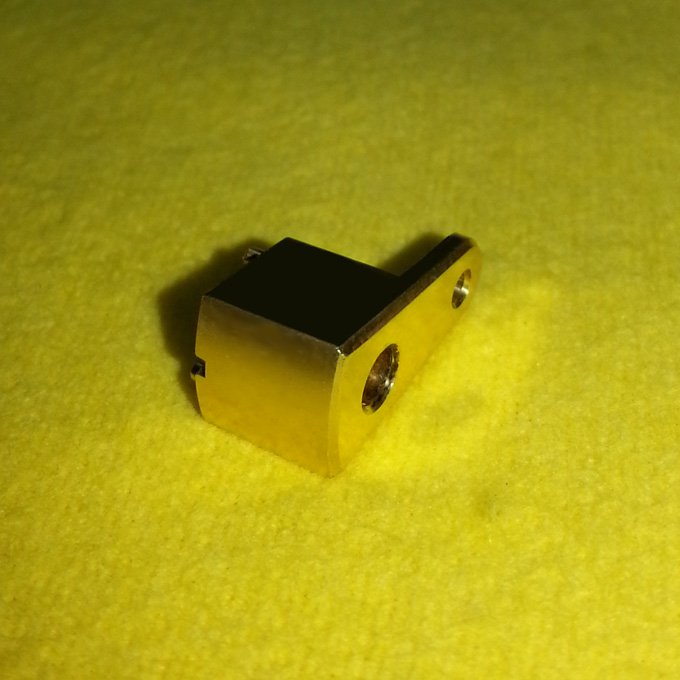
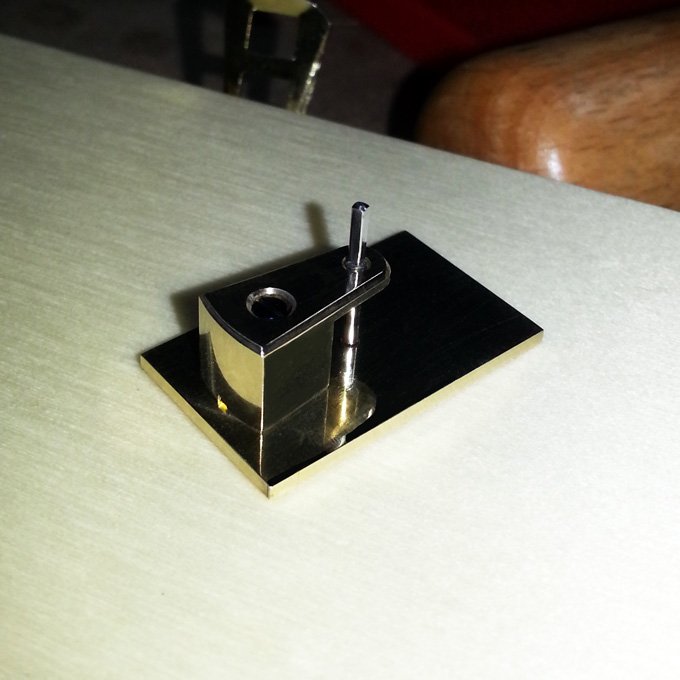
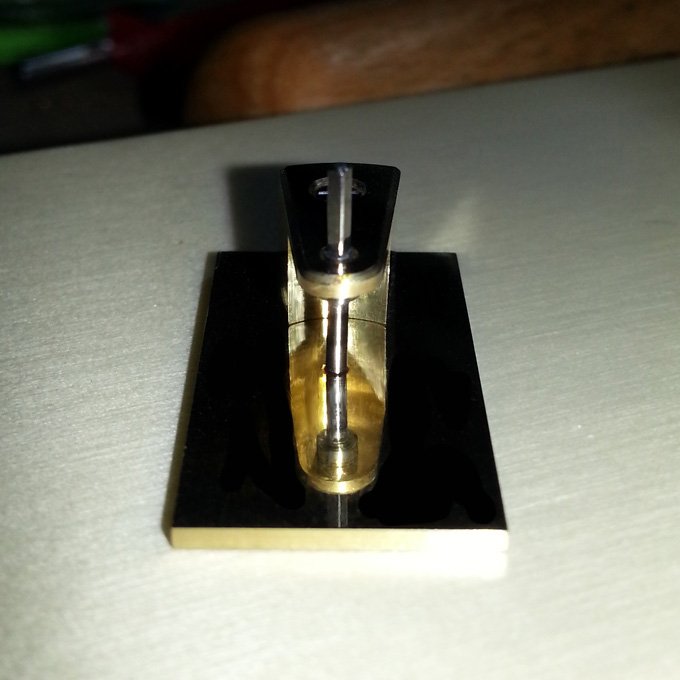
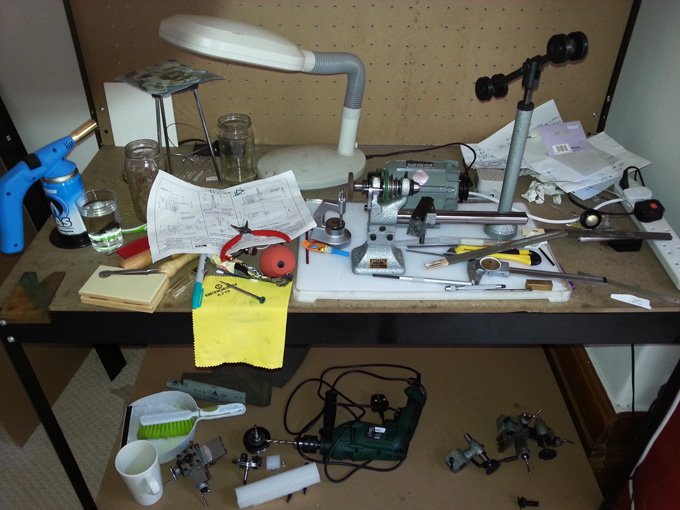
For the balance cock were given a large piece of square sectioned brass. It was probably enough to make 4 good attempts on. The first stage was to flatten one of the sides, which would work as the top to the pieceI ended up making two attempts at the balance cock. The first attempt is on the left (just some drilled holes) and here I am cutting away a previously drilled hole so that I can start on my 2nd attempt. Like before I used a printed 2D drawing of the cock stuck on the material as a template for both cutting and drillingMy lathe was new to me and part of the set-up included a milling attachment. As I needed to remove a fair bit of material, I decided to mill it out. The primary reason for milling the piece was excitement for using a new tool, rather than any practical reasonThe piece was held steady in a three jaw chuck, and I used the cross slides on the milling attachment to move the milling cutter across the surface of the material. I had 3 cross slides so I could adjust horizontal and vertical movement as well as depthThe results were ok. I milled along at different depths to get a feel for how it cut. What I found was that unless I made only shallow cuts there was a slight bending of all of the equipment (including the milling cutter) which led to the surface not always being cut flat. It was only minimal, but enough to be noticedIn the end milling the piece turned out to be a big waste of time. The set-up was not rigid enough to be used as a proper milling machine. It would have been far quicker to saw then file the piece. After cutting the end off the piece I was working on, I made a final cut on the cock to a depth that was a few tenths of a millimetre away from the size I wantedWhile the piece was still in a rough shape I decided to drill the holes for it. To do this I used a wax chuck I had previously made. Before I attached anything to it I turned the surface of the chuck flatThen the piece of brass was glued to the chuck. I have made a small hole in the reverse side so that it would line up with the pip on the wax chuckHolding a drill bit in the tails stock the wax chuck is then rotated on the lathe and the drill bit is extended into the brass piece. This will drill a hole that lines up directly with the centre of the wax chuck, which was where the pip was locatedTo remove any piece that I have glued it’s just a simple case of heating it up to around 100C, which will melt and burn the glue making the pieces fall apart from one anotherThen I flattened the piece and filed it so that I was getting close to the correct widthThe piece needed to be 7.5mm wide. Here it is 7.79mm, so almost there. The Vernier gauge is also great for checking whether the sides are parallel or not, as there will be visible gaps between the teeth when closed around the piece if the sides are not equalNext I needed to make a hole 2.6mm deep and 2.4mm wide that would take the head of the screw. Here I’m using a milling cutter, which is great as the bottom it makes will be completely flatUsing the back end of the Vernier gauge you can extend it into a hole you’ve made. Here it is 2.5mm deep and so I need another 0.1mm to be removedOnce I had received the exam paper I purchased a few items I thought I’d need, one of which was a specific chamfer drill bit. Its sides are set to 45 degrees and so you just need to move it into the hole I’ve just drilled until you make a cut of the depth you desireAfter removing the piece from the plate it was glued to, I reattached a print-out and checked the position of the holes I’d drilled. It was pretty much on centre, although I could make that better when I broached the hole by hand laterNow that the holes were drilled I needed to make the cock roughly the right size so that i could start to form the curvesUsing a piercing saw I removed material until I was between 0-5-1mm away from where I needed to beI then flattened the sides by draw filing the piece in a vice. After I was within 0.05mm I stoppedHere was the piece ready to have the curves added. You can see that at the tip I have removed some additional material. I don’t need to remove much here as only the top 1.3mm will be usedAttaching the piece to my way chuck, with it centred around the top pivot hole, I can then use my cutting tool set in my cross slide and remove materialSpinning the wax chuck I can then move the cutting tool and slowly make deeper cuts across the whole piece. I moved in very slowly as I was conscious that the piece could easily be detached and fly across the room if I went in too heavy handedYou can see the formation of the curve as I slowly move the cutting tool closer in towards the pieceThe finished outer curve. I was really pleased with the results, and there were only some minor scoring marks that could be easily polished outThe next curve to work on now was the one at the tip. This was more difficult as I would not be able to rotate the piece to cut it. I decided that I could move the lathe back and forth by hand instead. To ensure that I didn’t accidently turn too much and catch the sides I added some super glue onto the sides to act as a bumperBy moving the lathe by hand I was able to really control the cutting actionThe finished curve on the tip. The glue had a few knock marks on it, which meant that it had been a good idea to put it on or else I would have marked the side of the pieceAfter removing the template, the piece really started to come together. For the first time I could really see the piece being finishedI placed the cock back onto the wax chuck. For the chamfer on the outside curve I used another cutting tool set up to give me a nice even 45 degree angleI repeated the process to give the chamfer on the tip. For the side chamfer I decided that the simplest option was the best and so I locked the lathe and filed the sides with a needle fileIt was then just a case of creating parallel lines while I worked and making sure that they lined up with the chamfers on the tip and back I had already madeThe finished chamfers on the cockTo remove all the material for the post I had a few ideas. In the end as I opted for the easiest option which was to use a milling drill bit of the exact right size; 10mm diameter.Taking it in slowly the piece was rotated around the stationary milling cutter. It gave me a decent finish on the bottomThe inside curve also came out well, with parts I thought would be very tough, like the sharpness of the inside corner, needing very little finishingYou can see here the finish that the milling cutter gaveNot yet finished, but it was really incredible to see something that resembled a cock created from the original block of brassThe first attempt at a “test run”. Everything seemed to fit together nicelyBy this stage I had finished the screw and plate and also added the steady pins and so I tested everything againI had purposely made the screw thread and steady pins too long, just to be on the safe side. It was an easy task to cut them down to size laterAfter a whole lot of finishing the cock was ready. Note that I’ve also added in the little notch at the back; just formed with a needle file
Before I put everything together for the final time I reviewed all the parts I’d made:
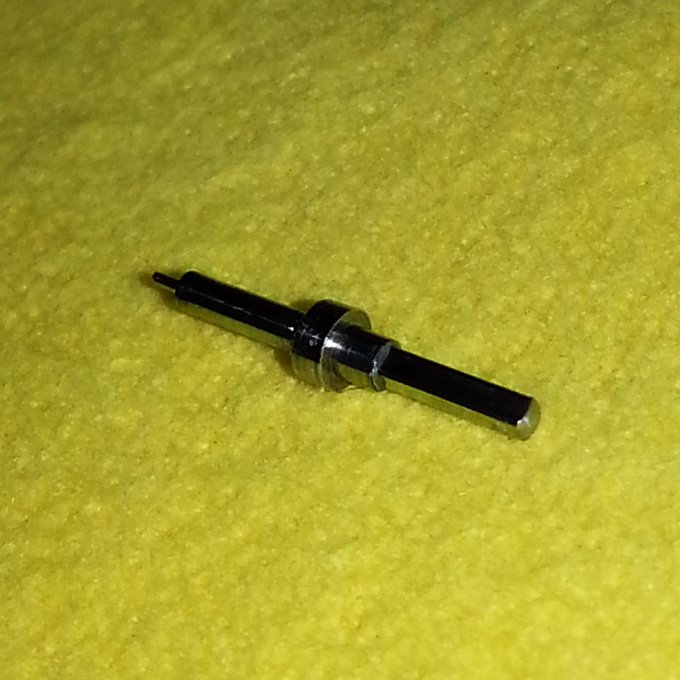
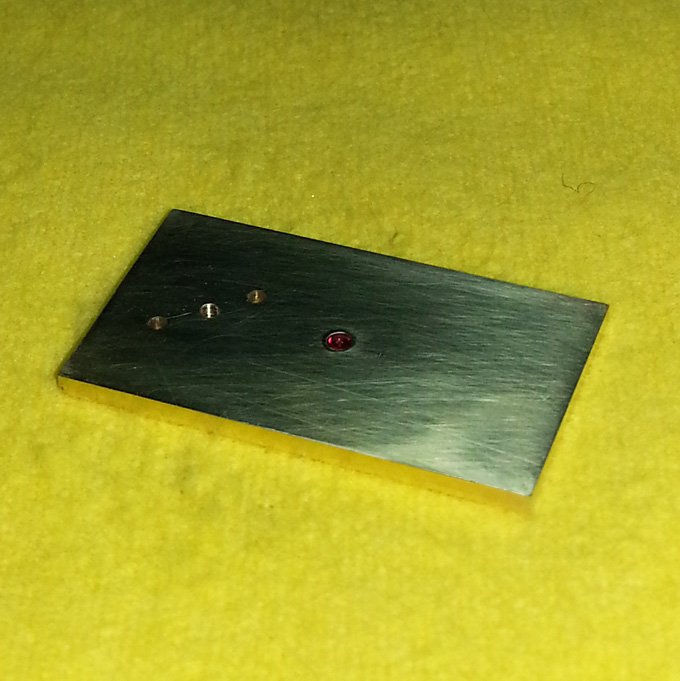
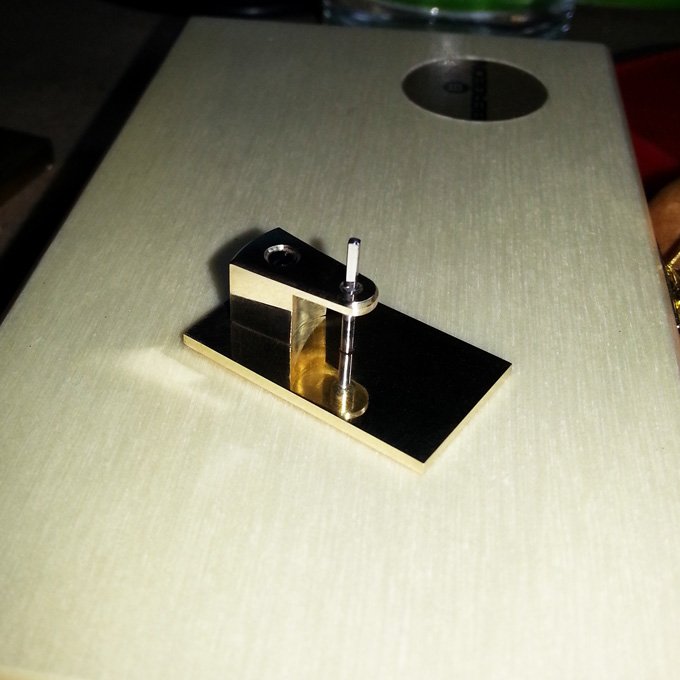
The finished cockThe steel arborThe blued steel screwThe brass plateFinally assembled. Wow, what a great feeling of relief that was!Final assemblyFinal assemblyFinal assemblyIn the end my work space looked like a bomb had hit it!Packed up and ready to be submitted to the BHI. I drove myself down to Upton Hall on the final day of submission, but stopped half way to have a couple of hours sleep in my car; as although the exam was important, it wasn’t worth the risk of putting myself, or someone else, in danger because I was driving while sleep deprived. After handing the piece over, I dropped over at my at the grandmother’s who lived nearby, and fell asleep exhausted in a chair faster than she could make me a cup of tea!
Conclusion
I can say with complete confidence that this was the hardest exam I have ever taken. In the end I passed, but the mark I got wasn’t as high as I had hoped for. There were mistakes that I made, some critical, as well as huge chunks of time that were wasted.
One of the most difficult parts of the exam was working alone and trying to figure everything out by myself. Even just getting feedback on what I was doing, or confirmation that you’re going down the right path is massively important.
It was also during what was perhaps the most stressful period in my entire life; not by my own choice I was in the process of changing jobs, my wife had just decided to get a divorce and I was being told by senior peers that I didn’t have what it takes to be a watchmaker.
So for this brief period (although at the time it didn’t feel brief) I was having to rethink everything. As I was taking this exam there was a very real possibility that the result would be futile as I would have to change careers.
But in the end it all came good and I was able to secure a job working for Tag Heuer.
The most satisfying part of passing this exam though was the realisation that I would never have to take it again!
7 comments
Peter Currie
25 August, 2014 at 9:26 pm
Hi Colin, many thanks for letting us in on your approach to making the Cock, I submitted my piece last year and scored 73%,and I agree with you this is a difficult exam, add to that the other difficulties you had going on, you done very well. Just got this years results and scored 51% for the Practical (Final Grade Unit 12 Certificate)
if you have the Examiners report for this year you’ll see the critic of my work, disappointed but will take the pass, just need to submit my Portfolio to finish, thanks again,
Hi Colin, thanks for this update, I found your blog several months ago and have enjoyed reading through all your posts. I’m sorry to hear about problems in your personal life, and also your professional life. I did wonder which firm you were working for when you said you’d secured employment with a Swiss firm in Manchester.
Like all practical trades I think watchmaking needs years of practice and experience before one can say “they have what it takes.” I think we are of similar age and I’m interested more as a hobby for now, but if I could turn the clock back I would have chosen this as a career when I left school.
Well it’s never too late to make the leap. I was 32 when I first heard about watchmaking and 34 when I was first employed as a watchmaker, so there’s no barrier based on age.
Keep up the hobby though, it’s always the best groundwork for a later career – even if it’s much later in life for you. Having a job that’s also your hobby can’t be so bad eh?
Hi again, just a quick follow on from my first message. I would be very interested to read about the kinds of things you work on at Tag Heuer. Perhaps the subject of a future blog post? Unless of course Tag Heuer wouldn’t approve of such things.
Hey Robert, I may at some point talk about work I’ve done. But unfortunately I won’t be able to mention any specifics of any company I’ve worked for.
In respect to Tag Heuer, they have a huge marketing department who carefuly craft their image, it’s not really my place to contribute to that. Although my intentions may be positive, anything I talk about may inadvertantly have a negative side effect. So you always have to be careful.
A lot of companies have methods and practices they don’t want made public, because of competitor advantage and also because they enjoy a mystique of what goes on in their workshop.
In any case, I don’t work for Tag Heuer anymore; I stayed there for a little less than a year before I was poached elsewhere. My time there was wholeheartedly positive, working with some incredible people and talent.


Peter Currie
25 August, 2014 at 9:26 pm
Hi Colin, many thanks for letting us in on your approach to making the Cock, I submitted my piece last year and scored 73%,and I agree with you this is a difficult exam, add to that the other difficulties you had going on, you done very well. Just got this years results and scored 51% for the Practical (Final Grade Unit 12 Certificate)
if you have the Examiners report for this year you’ll see the critic of my work, disappointed but will take the pass, just need to submit my Portfolio to finish, thanks again,
Peter
Colin
3 September, 2014 at 12:06 am
Thanks for your message Peter!
Well, a pass is a pass, although the mark you get does always feel very personal! Your score for the cock and plate exam beat me anyway. haha!
I’ll be doing my portfolio this year too hopefully, are you doing the watch or clock pathway?
Colin
Robert
2 September, 2014 at 4:37 pm
Hi Colin, thanks for this update, I found your blog several months ago and have enjoyed reading through all your posts. I’m sorry to hear about problems in your personal life, and also your professional life. I did wonder which firm you were working for when you said you’d secured employment with a Swiss firm in Manchester.
Like all practical trades I think watchmaking needs years of practice and experience before one can say “they have what it takes.” I think we are of similar age and I’m interested more as a hobby for now, but if I could turn the clock back I would have chosen this as a career when I left school.
Colin
3 September, 2014 at 12:18 am
Thanks Robert!
Well it’s never too late to make the leap. I was 32 when I first heard about watchmaking and 34 when I was first employed as a watchmaker, so there’s no barrier based on age.
Keep up the hobby though, it’s always the best groundwork for a later career – even if it’s much later in life for you. Having a job that’s also your hobby can’t be so bad eh?
Colin
Robert
3 September, 2014 at 4:29 pm
Hi again, just a quick follow on from my first message. I would be very interested to read about the kinds of things you work on at Tag Heuer. Perhaps the subject of a future blog post? Unless of course Tag Heuer wouldn’t approve of such things.
Colin
9 September, 2014 at 10:38 pm
Hey Robert, I may at some point talk about work I’ve done. But unfortunately I won’t be able to mention any specifics of any company I’ve worked for.
In respect to Tag Heuer, they have a huge marketing department who carefuly craft their image, it’s not really my place to contribute to that. Although my intentions may be positive, anything I talk about may inadvertantly have a negative side effect. So you always have to be careful.
A lot of companies have methods and practices they don’t want made public, because of competitor advantage and also because they enjoy a mystique of what goes on in their workshop.
In any case, I don’t work for Tag Heuer anymore; I stayed there for a little less than a year before I was poached elsewhere. My time there was wholeheartedly positive, working with some incredible people and talent.
Colin
Robert
13 September, 2014 at 1:59 pm
Yes I thought as much, I wish you the best of luck for the future.